Manage Users and Groups
You can invite and delete users as well as create and manage permission groups. You can search from both tabs, and filter using the column headers.
IMPORTANT: Every user added to SysTrack (B2C or SAML) is added to the group All Users. This is a default group that can not be removed. When the tenant is created the All Users group will have access to all features of SysTrack. You should adjust this group's permissions to your required role based access requirements.
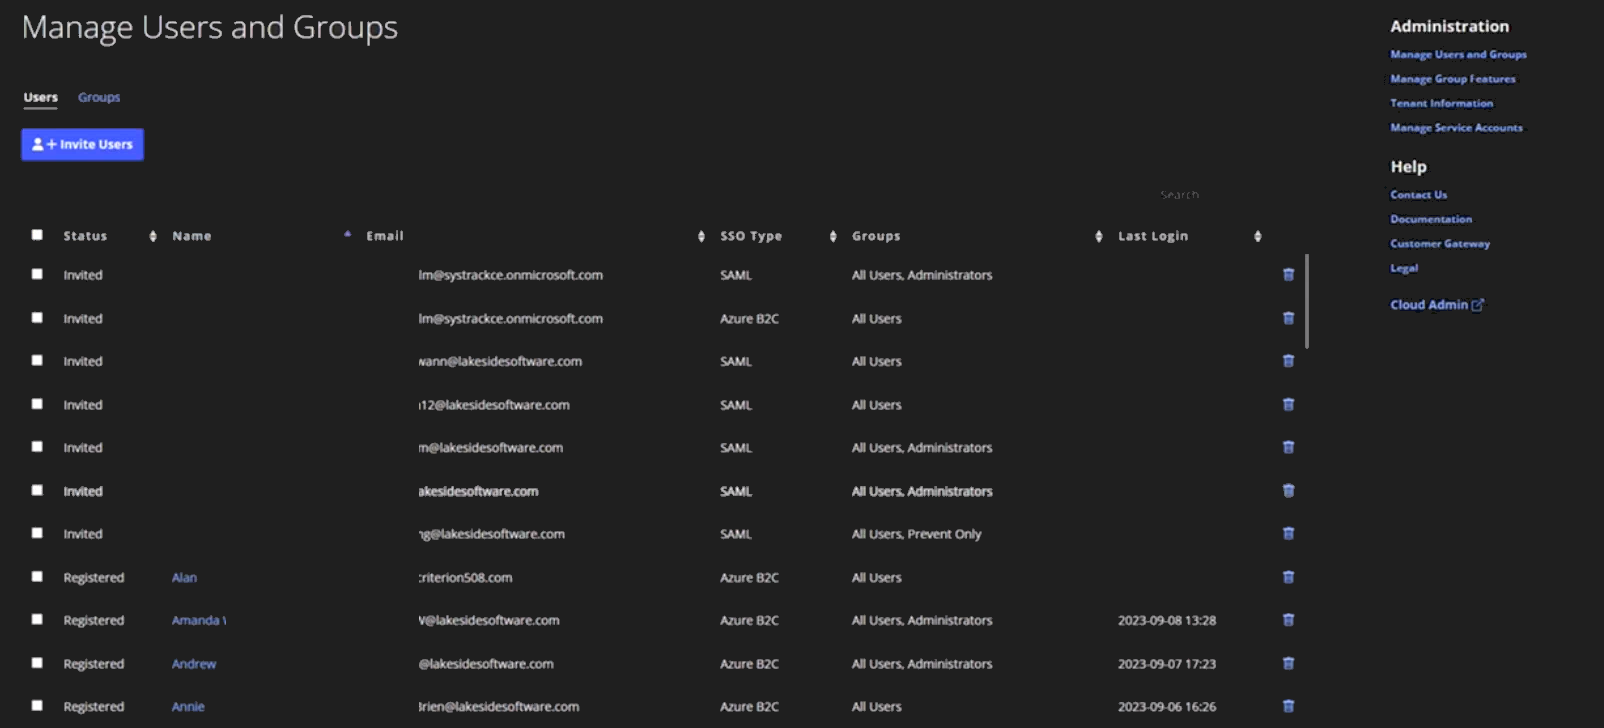
The Users tab includes the following information:
-
Status: Invited (a user that has been added, but not yet logged in to SysTrack) or Registered.
-
Name
-
Email
-
SSO Type: Indicates whether the user's authentication is SAML or Azure B2C.
-
Groups: The groups that they are assigned.
-
Last Login: The date they were last in the application.
-
Delete: You can delete by a single user or you can select multiple users, which will change the button from Invite Users to Delete Users, and allow you to do a bulk delete.
NOTE: Tenants that are not configured for SSO SAML will not have the SSO Type column.
Invite Users
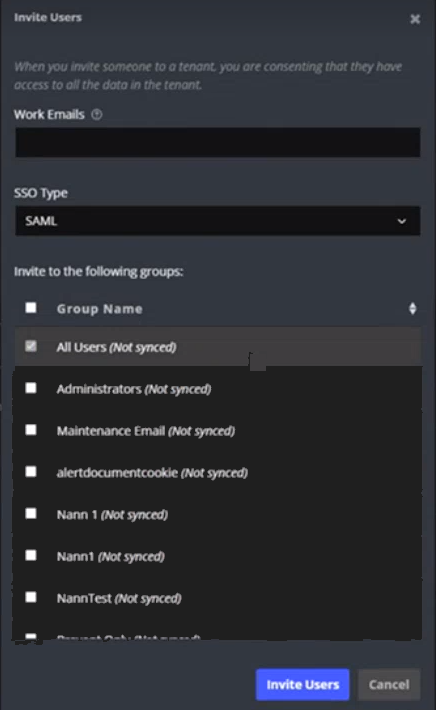
Click Invite Users to add people and enter the following:
-
Work Email: This must be the email address associated with your identity provider. You can add multiple email addresses using a comma to separate. For example: email1@domain.com,email2.domain.com
-
SSO Type: Select either SAML or Azure B2C.
-
If the tenant is not configured for SSO SAML, this option is disabled until the tenant is configured.
-
New users are added to the All Users group by default. You can add the user to any additional groups that are listed.
-
-
Click Invite Users to send invitation.
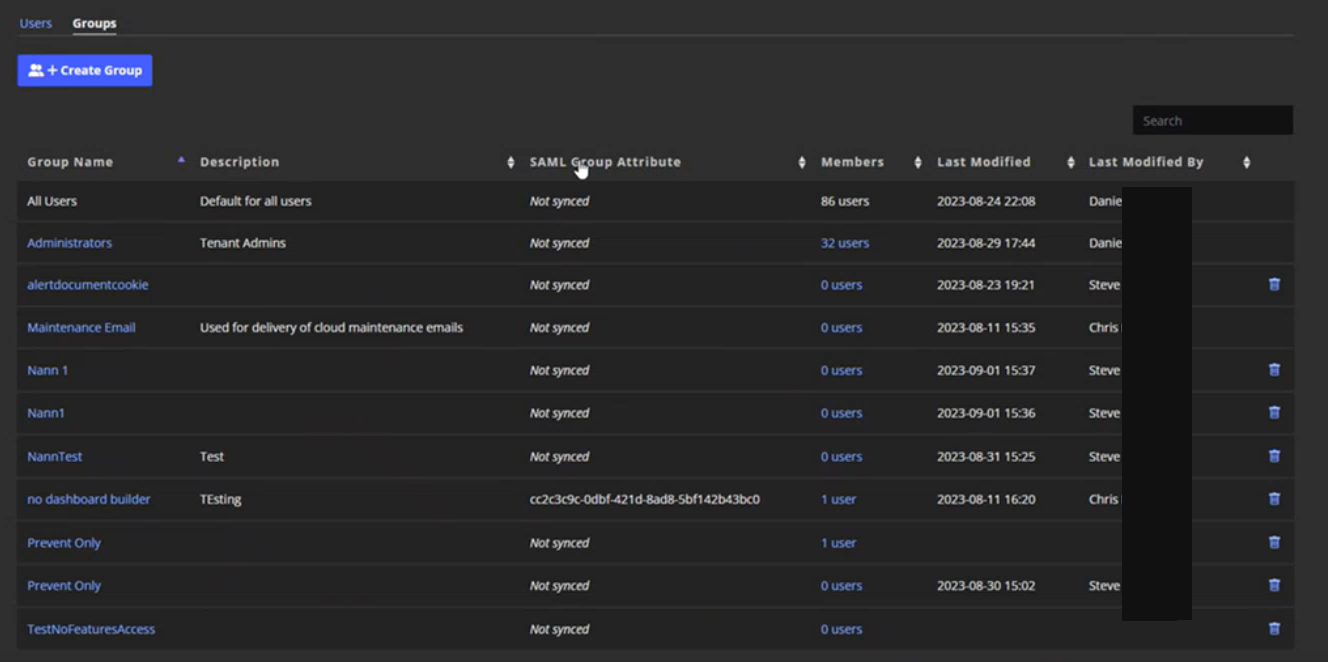
The Groups tab allows you to manage permission groups and includes the following information:
-
Group Name
-
Description
-
SAML group Attribute: Not synced or the group attribute set for that group.
NOTE: Tenants that are not configured for SSO SAML will not have the SAML Group Attribute column.
-
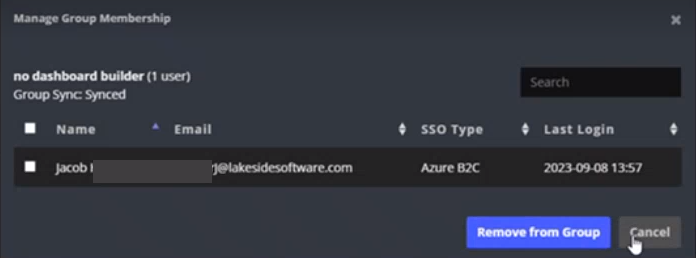
Members: The number of users in the group. If you click a member the Manage Group Membership box opens, and you can view all the users in that group, see whether the group is synced, and remove people from the group.

NOTE: You cannot remove yourself from a group. (Tenants not configured for SSO SAML will not see the SSO Type column.)
-
Last Modified: The date and time.
-
Last Modified By: Who made a change.
-
Delete - You can delete by a single group.
Create a SysTrack Permission Group
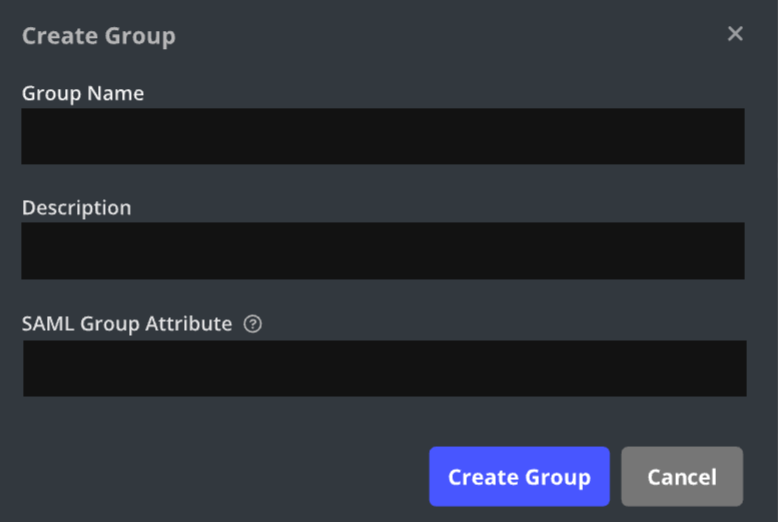
Click Create Group and enter the following:
-
Group Name: Enter a name for the group.
-
Description: Enter information for the group.
-
SAML Group Attribute: If the tenant is configured for SAML, and you have provided the SAML Group Attribute name in SSO configuration, you can synch directory groups with your SysTrack groups. You will need to enter the value that is passed as the group claim. For example, with Azure EntraID, this would be the group object ID.
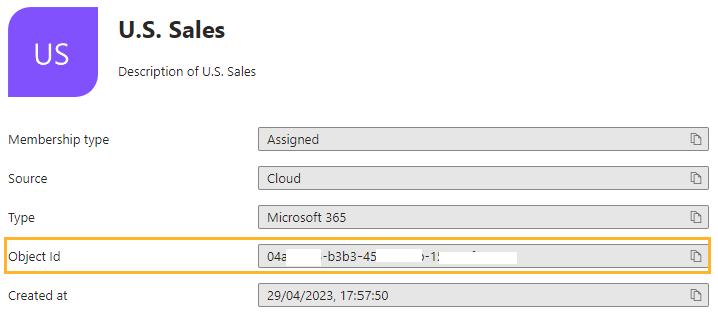
NOTE: If you are using group claims to control access to SysTrack, you must update the All Users permission set to have either the lowest level of permissions or none at all.
NOTE: Some Identity Providers limit the number of group claims that can be sent within a SAML assertion. You may need to configure filtering of the groups claims that are sent if you find users are not being added to your groups. See Configure Group Claims for Applications.
-
Click Create Group.
On This Page